
If there are folders that you access frequently, this post shows you how to quickly access these folders in Windows Explorer without having to enter the full path to the folder. We will discuss three ways to map folders to drive letters.
Method 1: Use the subst DOS Command
First, we will use an old DOS command, called subst, that allows you to assign a drive letter to any folder in Windows.
For this example, we will assign a drive letter for the following folder: C:\Users\Lori Kaufman\Documents\My Work.
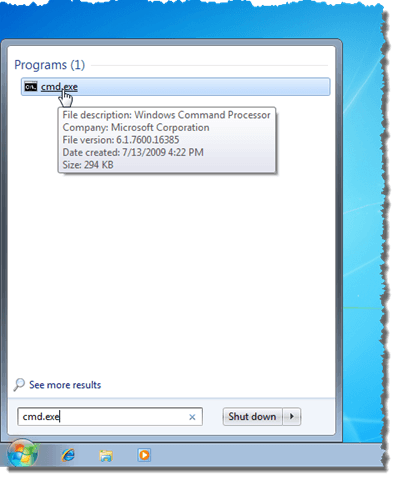
Open the Start menu and enter “cmd.exe” (without the quotes) in the Search programs and files box. Click cmd.exe in the results to open the command prompt window.
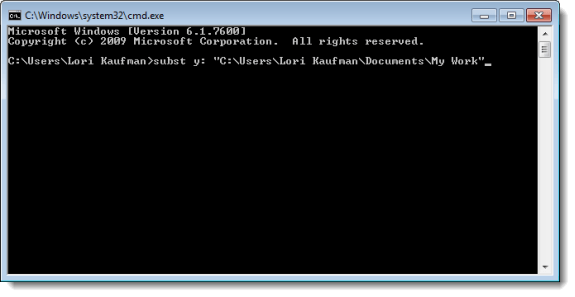
In the command prompt window, type the following command to associate drive “Y:” with the folder.
subst y: “C:\Users\Lori Kaufman\Documents\My Work”
NOTE: If there are spaces in the path name, be sure to put quotes around the full path.
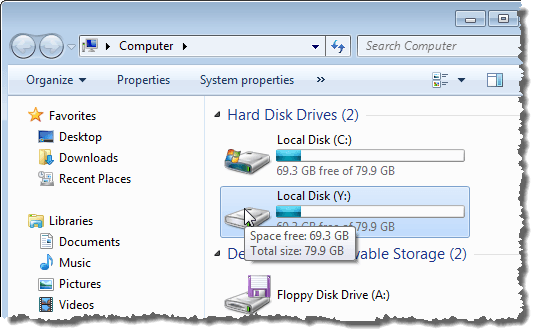
Now, when we open Windows Explorer, we see a new drive labeled Y: that will directly open the My Work folder.
Use this same process to assign different drive letters to all your frequently used directories. However, the subst command cannot be used with mapped network folders.
Method 2: Use the psubst Utility
A disadvantage of using the subst command is that these virtual drives are temporary and will be removed as soon as you shutdown or restart the computer or log off. However, you can solve this by using the free psubst utility, which operates like the subst command but it creates permanent virtual drives that are persistent even after rebooting your computer.
Download the psubst utility from
http://www2.alter.org.ua/en/soft/win/psubst/
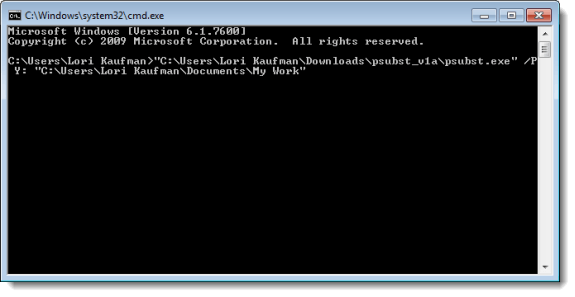
Extract the .rar file you downloaded. Open the command prompt as described earlier in this post. We entered the following command to map the My Work folder to the Y: drive letter.
“C:\Users\Lori Kaufman\Downloads\psubst_v1a\psubst.exe” /P Y: “C:\Users\Lori Kaufman\Documents\My Work”
NOTE: Be sure to enter the full path to the psubst.exe file (the path where you extracted the .rar file). Also, remember to put quotes around any path name that contains any spaces.
The following is how you use the psubst utility, the commands available for it, and examples of how to use it.
Usage:
- psubst [
] :
Commands:
- /D – delete existing subst drive letter
- /DF – force delete existing subst drive letter
- /P – create persistent subst (across system reboots)
- /?,/H – display this help message
- No commands – operates like standard SUBST utility
Examples:
- psubst /P Y: C:\temp – Maps Y: to C:\temp and remains after a reboot
- psubst /DF Y: – Deletes the mapping to Y:
Method 3: Use a Graphical Tool
If you would rather use a graphical tool to map drive letters to folders, there is a free utility called, Visual Subst, that’s like a graphical version of the psubst utility.
Download Visual Subst from
http://www.ntwind.com/software/utilities/visual-subst.html
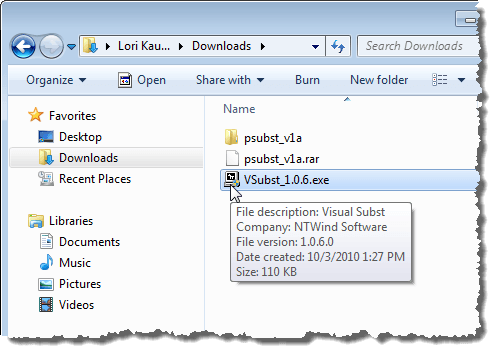
To install Visual Subst, double-click on the .exe file you downloaded.
Click Yes on the User Account Control dialog box.

Read through the License Agreement that displays and click I Agree.

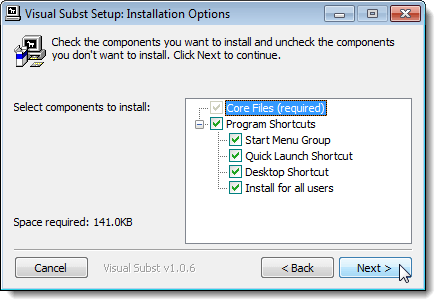
On the Installation Options screen, select the check boxes for the Program Shortcuts you want to install and click Next.
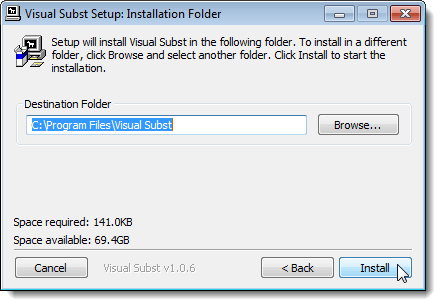
If you want to change the folder in which Visual Subst is installed, use the Browse button to select a different folder. We accepted the default folder. Click Install to begin the installation.
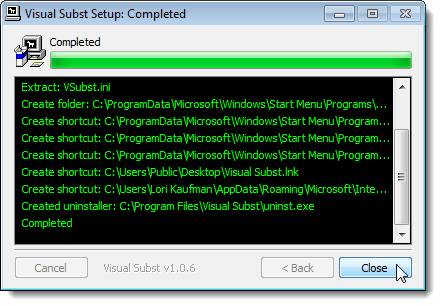
When the setup is completed, click Close.
If you selected to install a Desktop Shortcut, it is added to the desktop. Double-click the shortcut to start the program. You can also start it from the Start menu.
![]()
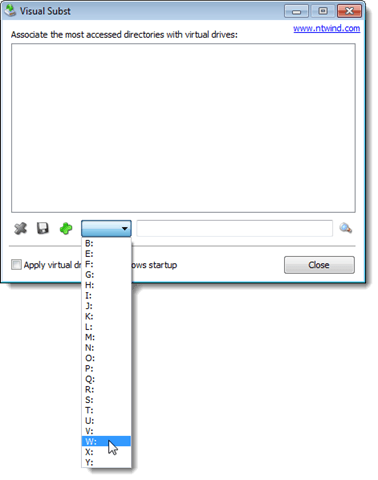
The main Visual Subst window displays. Select a desired drive letter from the drop-down list.
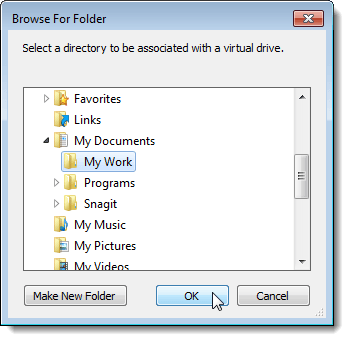
To select a folder to map to the selected drive letter, click the Browse button to the right of the edit box.

On the Browse For Folder dialog box, navigate to the folder you want to map, select it, and click OK.
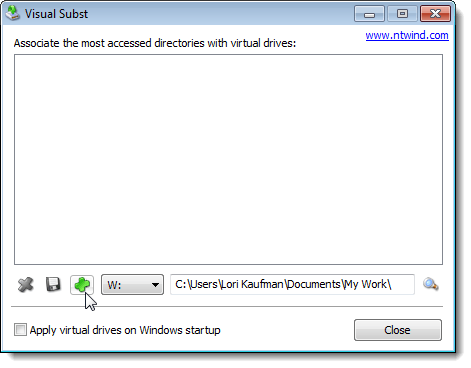
To map the selected folder to the selected drive letter, click the green plus button on the button bar to the left of the drive letter drop-down list.
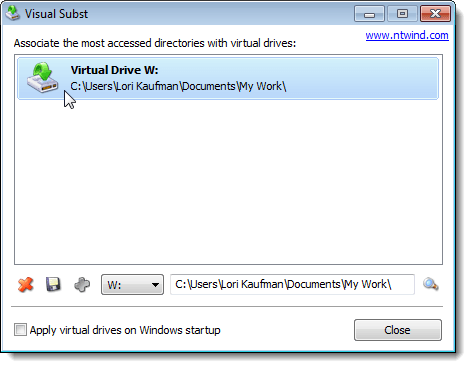
The virtual drive is added to the list. Add more virtual drives by selecting a drive letter and a corresponding folder and adding it to the list as described above.
If you want the virtual drives you defined available automatically when you start Windows, select the Apply virtual drives on Windows startup check box so there is a check mark in the box.

To save the settings for Visual Subst, click the floppy disk button on the button bar. A file with the .ini extension is saved in the same directory where Visual Subst was installed.
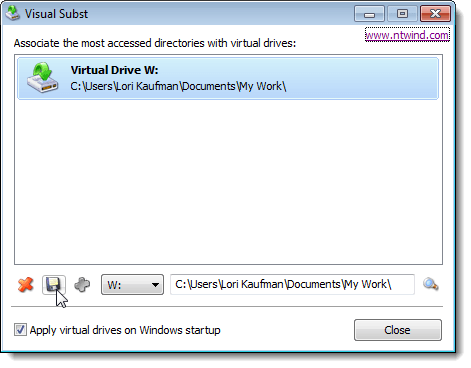
To close Visual Subst, click the Close button.

The mapped folders display as Hard Disk Drives in Windows Explorer.

If you want to remove the mapping for a folder, open Visual Subst again and select the virtual drive from the list. Click the red X button on the button bar.

Mapping folders to drive letters can save you a lot of time and Visual Subst makes adding virtual drives easy. Visual Subst works in Windows 2000, Windows XP, and later versions of Windows.


0 comments:
Post a Comment